
Creating a contact
-
Login to your support portal
-
Click on the New dropdown and select New Contact
-
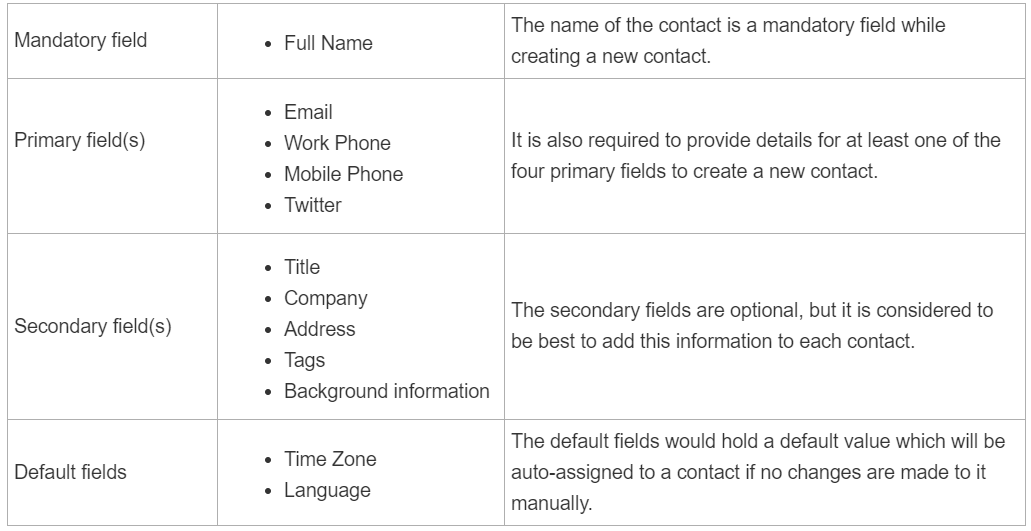
Fill in all the details of the contact in the contact form. The requirements for creating a new contact are listed below:
-
The default fields would hold a default value which will be auto-assigned to a contact if no changes are made to it manually.
-
Type in the contact's address, contact, social IDs, timezone, language, and other background information.
-
If you are on the Premium or above plan, this feature can be used by clicking on the ticket icon against the associated company (multiple companies can be associated)
-
Once you are done, click Save.
-
A profile for the contact is now successfully added. Similarly, add as many contacts as needed.
-
Once saved, the contact will receive a user activation email with a link to verify their contact and log into your customer portal.
Creating a company
-
Login to your support portal.
-
Click on the New dropdown and select New Company
-
Fill in the company name (mandatory), description about the company (optional), notes associated with the company if any, and domain names for the company (optional).
-
Multiple domains can be added for the same company by separating them using commas.
-
For accounts that are on the Premium plan, in order to help you store extensive details of a company, four additional default fields have been introduced:
Health Score - an editable dropdown of three choices: happy, doing okay, at risk. Based on the ongoing relationship, one of these values can be associated with a company.
Account Tier - an editable dropdown of three choices: basic, premium, and enterprise. You can categorize the companies based on what tier they come under, according to your business.
Renewal Date - a date field that can contain the necessary contract or renewal date for that company.
Industry - an editable dropdown of standard industry choices that you can associate a company with.